
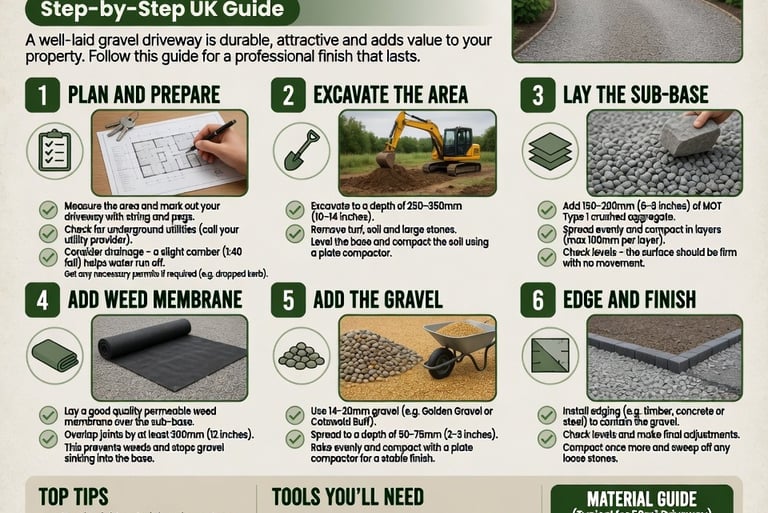
How to Lay a Gravel Driveway — UK Step-by-Step Guide
Learn how to lay a gravel driveway that won't sink or rut: excavation depth, MOT Type 1 sub-base, membranes, gravel grids and exactly how much material to order.
6/12/20264 min read
How to Lay a Gravel Driveway: Step-by-Step UK Guide
A gravel driveway is one of the most affordable ways to surface a drive — and one of the easiest to get wrong. Done properly, it stays firm and tidy for decades. Done badly, the stones sink, ruts form within months, and weeds take over by the second summer. The difference is almost never the gravel itself: it's what's underneath.
This guide walks through the full process the way a good contractor would do it, including exactly how much material to order at each stage.
What you'll need
For a typical single-car driveway of around 15–20 m², expect to use a weed-control geotextile membrane, 100–150 mm of MOT Type 1 sub-base, optional gravel grids, and a 50 mm surface layer of 20 mm gravel. You'll also need a vibrating wacker plate (hire one for the weekend), a wheelbarrow, rake, and shovel.
Before buying anything, work out your quantities with our MOT Type 1 calculator for the sub-base and our gravel calculator for the surface layer. For a 20 m² driveway, that's typically around 6 tonnes of Type 1 and 1.6 tonnes of gravel.
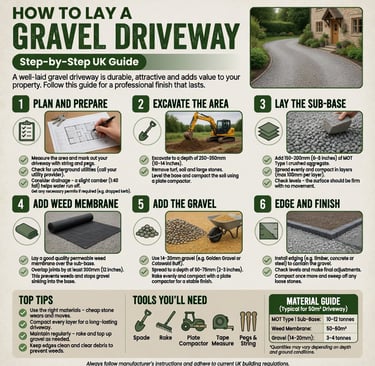
Step 1: Mark out and excavate
Mark the edges of your driveway with string lines or spray paint. Then excavate to a depth of 150–200 mm below your finished level: 100–150 mm for the sub-base plus 50 mm for the gravel. On soft or clay ground, dig 50 mm deeper.
Dig out all topsoil and any soft spots — organic material rots and settles, which is the number one cause of sunken patches later. The base of your excavation should be firm subsoil. Slope the excavation very slightly (about 1:80) away from the house or garage so rainwater drains away from buildings.
Step 2: Install edging
Gravel migrates — it's the material's only real weakness. Solid edging is what keeps your driveway looking sharp instead of slowly bleeding stones into the lawn. Concrete edging kerbs, brick soldier courses, pressure-treated timber, or steel edging all work. Set edging so its top sits at, or slightly above, your finished gravel level, and bed it on a concrete haunch so vehicle tyres can't push it over.
Step 3: Lay the membrane
Roll a permeable geotextile membrane across the excavated base, overlapping joins by at least 300 mm. The membrane does two jobs: it stops weeds growing up from below, and it stops your expensive sub-base slowly disappearing into the subsoil. Use a proper woven geotextile, not cheap plastic sheeting — water must be able to drain through it.
Step 4: Build the sub-base — the step that decides everything
This is where driveways are won or lost. Spread MOT Type 1 in layers no thicker than 75–100 mm, compacting each layer with the wacker plate — at least 4 to 6 passes — before adding the next. For a car driveway you want a finished, compacted depth of at least 100 mm; go to 150 mm if vans will use it or your ground is soft.
Type 1 compacts down by roughly 15–20%, so don't be surprised that your loose layers shrink. The finished sub-base should feel like solid ground underfoot — if the wacker plate still leaves marks, keep compacting. If you're unsure how much Type 1 to order, the rule of thumb is one tonne per 5 m² at 100 mm compacted depth, or use the MOT Type 1 calculator for an exact figure with wastage included.
Step 5: Gravel grids (optional, but worth it)
Plastic honeycomb gravel grids sit on top of the sub-base and hold the surface stones in place. They stop ruts forming in wheel tracks, hugely reduce raking, and make the surface usable for prams, bikes, and wheelchairs. They add cost, but on a driveway (as opposed to a path) they're usually worth it. Clip the panels together across the full area before filling.
Step 6: Spread the gravel
Spread your surface gravel at 50 mm depth — about two bulk bags per 10 m². Use 20 mm angular gravel for driveways: smaller stones get stuck in tyre treads, rounded pea gravel never locks together, and larger stones are unpleasant to walk on. Rake it level, slightly proud of your grids if you used them (about 10–15 mm of gravel above the grid top hides the plastic).
Don't compact the decorative layer — gravel is meant to sit loose. Just rake it even and let traffic settle it naturally.
Aftercare
Rake the surface level every few months and top up the gravel every few years — a well-built driveway loses surprisingly little. Treat any adventurous weeds early; with a membrane underneath they root only in surface dust and pull out easily. In autumn, blow or rake leaves off promptly so they don't compost into the stones.
Common mistakes to avoid
Skipping the sub-base is the big one: gravel laid straight onto soil becomes a muddy, rutted mess within one winter. Using too thick a gravel layer is the second — more than 60 mm of loose stone feels like walking on a beach. And buying "budget hardcore" instead of certified MOT Type 1 means unpredictable compaction; the small saving isn't worth a driveway that settles unevenly.
Quick reference: materials for common driveway sizes
A single-car driveway (about 15 m²) needs roughly 4.7 tonnes of Type 1 at 150 mm and 1.2 tonnes of gravel. A standard double driveway (about 30 m²) needs around 9.5 tonnes of Type 1 and 2.4 tonnes of gravel. A large double with turning space (50 m²) needs about 15.8 tonnes of Type 1 and 4 tonnes of gravel. All figures include compaction but not wastage — add 5–10% when ordering, or use our calculators for exact quantities.
A gravel driveway built this way — proper excavation, membrane, compacted Type 1, contained edges — will outlast many block-paved drives at a fraction of the cost. The materials are cheap; the discipline in the sub-base is what you're really investing.
Quoteen
Your one-stop destination for accurate and easy-to-use online calculators
Popular categories
© 2026 Quoteen. All rights reserved.
Connect